The following is an article I wrote for the MagPi (the official Raspberry Pi magazine) issue 39. You can download a PDF version or buy the DTF (Dead Tree Format) version. Turn to page 56 or keep reading below.
P.S. You might like some of my other Pi articles, including my Raspberry Pi Electricity Monitor or Raspberry Pi Model B Comparison.
Make a device to capture photographs at regular intervals and turn these images into a video
Time-lapse photography reveals exciting things about the world which you wouldn’t otherwise be able see. Things that happen too slowly for us to perceive: bread rising and plants growing; the clouds, sun, moon, and stars crossing the sky; shadows moving across the land. In this tutorial, we’ll be making a Raspbian-based device that lets you watch things that are too slow to observe with the naked eye. To do this, we will capture lots of still photographs and combine these frames into a video with FFmpeg/libav, which can then be accessed via a web browser.
Step 1: Connect the Camera Module
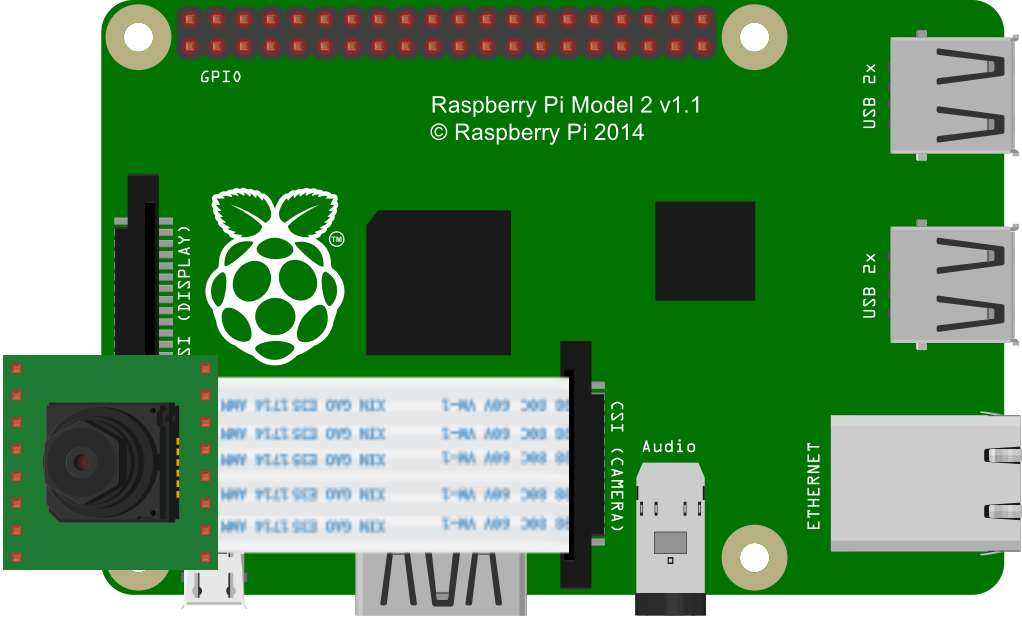
First, connect the camera module to the Raspberry Pi with the included ribbon cable. Locate the correct socket; it’s on the top of the Raspberry Pi circuit board and is the one furthest away from the micro-USB power connector. The socket is handily labelled ‘CAMERA’ on the newer Raspberry Pi models. Lift up the outside of the socket to release the clamp, then insert the ribbon cable with the metal contacts facing towards the micro-USB power connector. Finally, hold the ribbon cable in position and push the outside of the socket back down to clamp the cable in place.
Step 2: Enable and test the camera
Power the Raspberry Pi up. You now have a choice: boot to the command line, open a terminal window, or establish a secure shell (SSH) connection. Enable the camera by running this command from a terminal to launch the Raspberry Pi configuration tool:
sudo raspi-config
Then select the ‘Enable Camera’ option. You can test the camera by running the following command:
raspistill -o testimage.jpg
The red LED on the camera module should light up for 5 seconds and a JPEG image will be saved to the current directory. If the camera is mounted upside down, then you can use the vertical and horizontal flip command-line switches (-vf and -hf).
Step 3: Install and configure software
Install a web server to access your images remotely. Run this command to install Apache:
sudo apt-get install apache2
Remove the default page to see the contents of the directory:
sudo rm /var/www/index.html
Visit the IP address of your Pi (e.g. http://192.168.1.45 – you can find this by using ifconfig) and you should see an empty directory listing. If you run the following command and refresh the page, you should see an image file listed. You run this as a superuser so you can write to the directory.
sudo raspistill -o /var/www/testimage.jpg
Click on the file link and you’ll see the image in your browser.
Step 4: Capture the images
Set up your scene and check the positioning of the camera.
sudo raspistill -w 1920 -h 1080 -o /var/www/testimageFullHD.jpg
The width and height have been changed to capture a smaller image in 16:9 aspect ratio. This makes things easier later. The top and bottom are cropped, so make sure that your subject is in frame. Run this to start the capture:
sudo raspistill -w 1920 -h 1080 -t 10800000 -tl 10000 -o /var/www/frame%04d.jpg &
This takes a photograph every ten seconds (10,000 milliseconds) for three hours (10,800,000 milliseconds). The ampersand (&) at the end runs the process in the background.
Step 5: Prepare to make the video
You can render the video on the Raspberry Pi, but it’ll be very slow. A better way is to transfer the files to a more powerful computer. In any case, you’ll need to install the tools on the rendering machine; for the Pi, enter:
sudo apt-get install libav-tools
This installs a fork of FFmpeg, but you can also use the original FFmpeg. To copy the images to a remote machine, you can download them from the web server using wget or curl. For example:
wget -r -A jpg http://192.168.1.45
Or if you don’t have wget…
curl http://192.168.1.45/frame[0001-0766].jpg -O
Change the IP address and numbers accordingly.
Step 6: Make the video
The final step is to make the video. Run this command to start the rendering process:
sudo avconv -i /var/www/frame%04d.jpg -crf 4 -b:v 10M /var/www/video.webm &
When this has finished, you’ll be able to view the video in your browser. The default frame rate is 25fps. This compresses three hours of frames at ten-second intervals to about forty seconds of video. You can adjust this with the -framerate command-line option. The bitrate (-b:v) has been set high, and the Constant Rate Factor (-crf) low, to produce a good-quality video.
Here is the finished video. It’s not terribly exciting as it wasn’t warm enough for the bread dough to rise a huge amount.
I’m working on a more advanced time-lapse project which is better suited for longer time periods. The above tutorial using raspistill directly is only good for a few hours. My new system uses cron and has been performing well. Over a month of continuous running and no issues so far. This first tutorial is really just an introduction designed for teaching use of the command line. Demonstrating transferable skills such as setting up a web server and batch downloading with the tools curl and wget.