The long-awaited 64-bit version of Raspberry Pi OS is out, joining the 32-bit and legacy options. Here’s how to set up a headless unit using Raspberry Pi Imager.
It’s almost 10 years since the Pi was first released on 24 Feb 2012 (although the blog has been around longer) and we now have a lot of choice for hardware and software. Here I’ll show how to setup a headless (lite) Pi 4B with 64-bit Raspberry Pi OS using Raspberry Pi Imager on Ubuntu LTS. I’ll also take a brief tour of some of the new updates and show how to backup and shrink your SD card image. You could use Balena Etcher if already installed but Raspberry Pi Imager is much nicer and far smaller (350 KB vs almost 90 MB).
A Raspberry Pi may not be the best hardware technically but it does have a great community and there is value in using the most popular choice due to the level of support and documentation available. This is common in tech, the “best” solution doesn’t always capture the most mindshare. If you are looking to build a router or NAS then you may want to look at hardware that is more suitable for these jobs.
Installing Raspberry Pi OS Lite (64-bit)
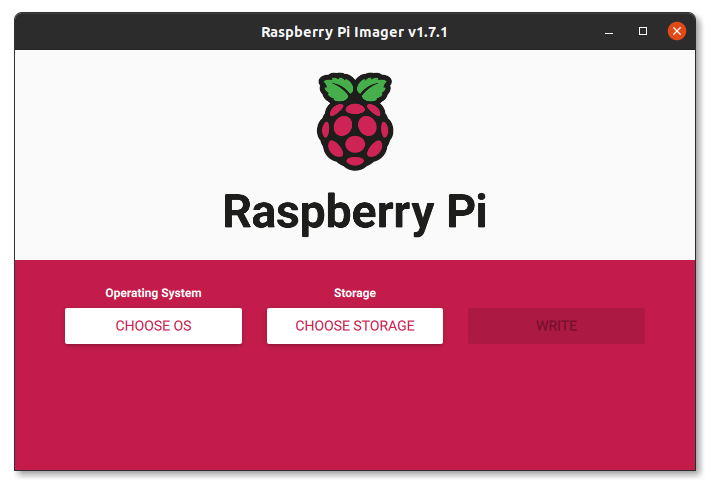
Download and install the latest Raspberry Pi Imager (currently 1.7.1). This is as simple as installing the .deb package on Ubuntu (uninstall an old version first if you already have it installed). Launch Imager from the application menu.
![]()
Make sure you have a suitable micro SD card inserted into your computer. The contents will be erased when writing to it.
Click Choose OS.
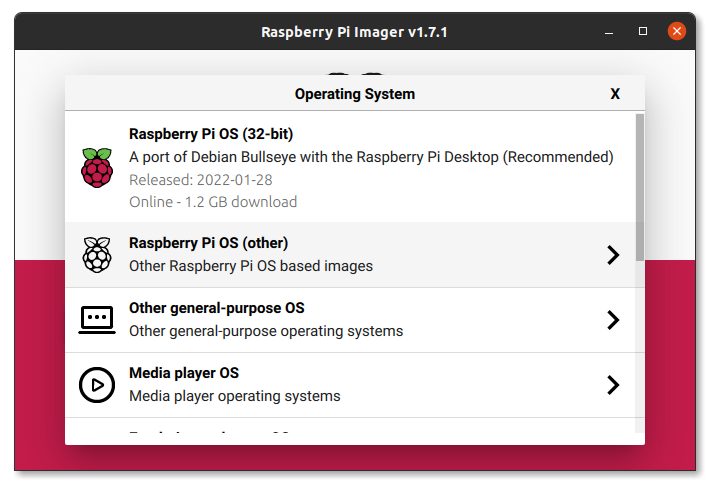
Select Raspberry Pi OS (other).
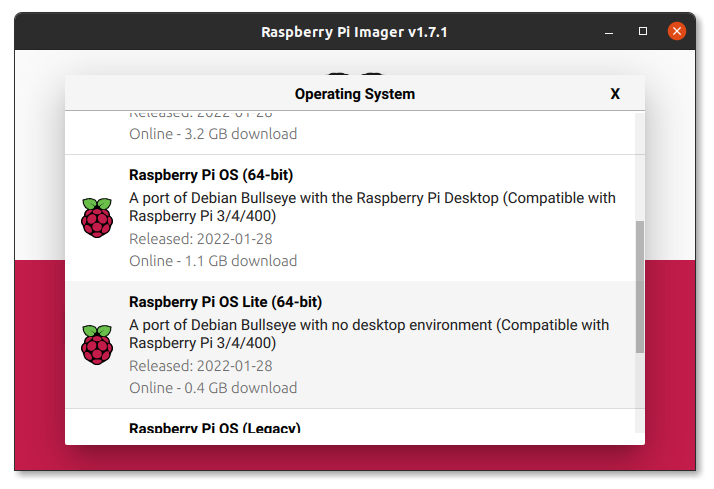
Select Raspberry Pi OS Lite (64-bit).
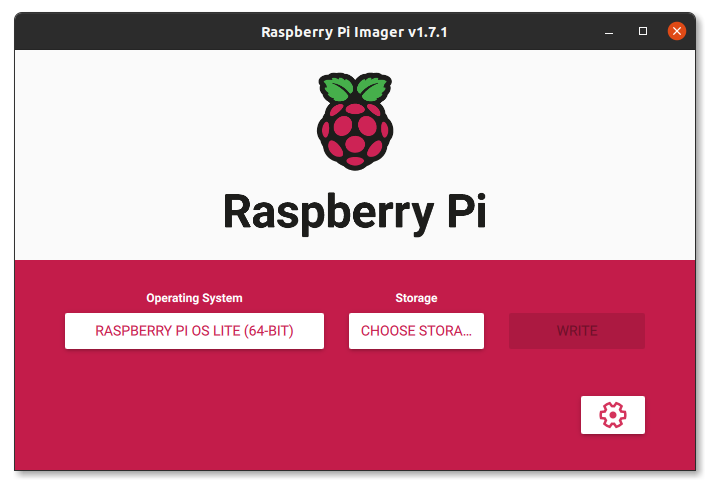
Click Choose Storage.
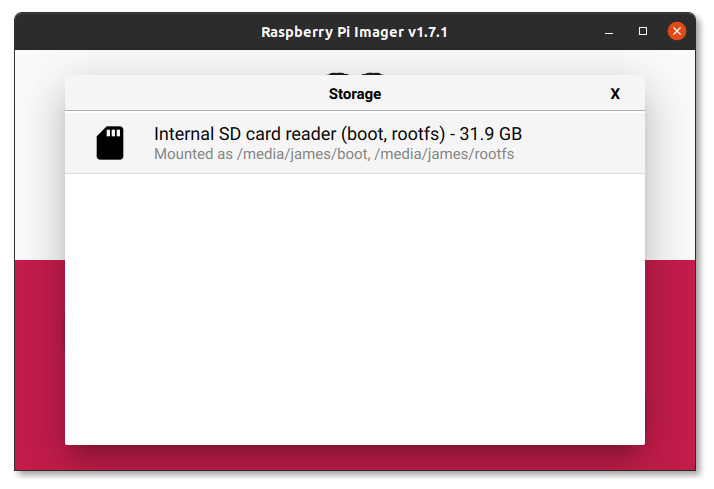
Select your SD card.
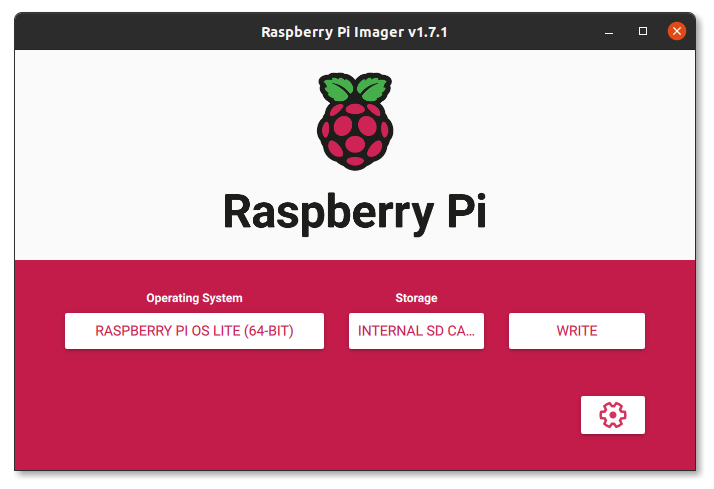
Click the cog button (in old versions press Ctrl+Shift+X for eXpert mode).
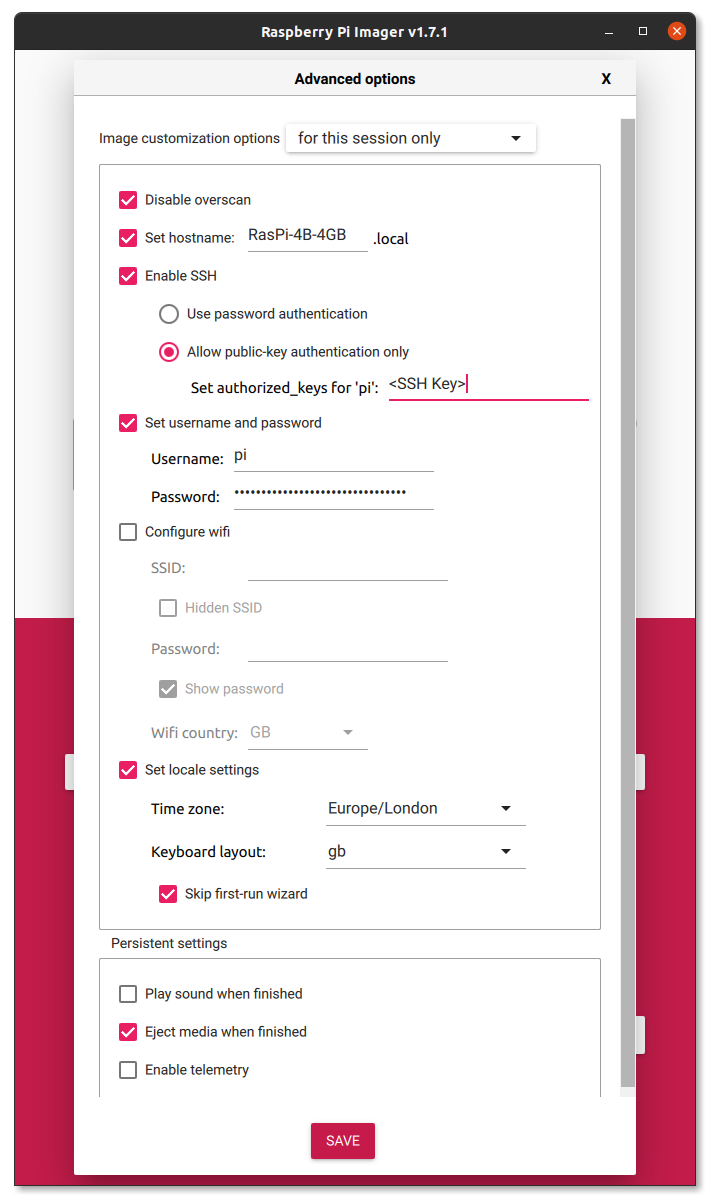
I typically use the following settings:
- Disable overscan
- Set hostname to something unique
- Enable SSH
- Allow public-key authentication only
- Set authorized_keys for ‘pi’: {your public key - pre-populated}
- Change the pi user password to something long, secure and unique
- Set locale settings
- Time zone: Europe/London
- Keyboard layout: gb
- Skip first-run wizard
- Eject media when finished
- Enable telemetry: off
Click Save.
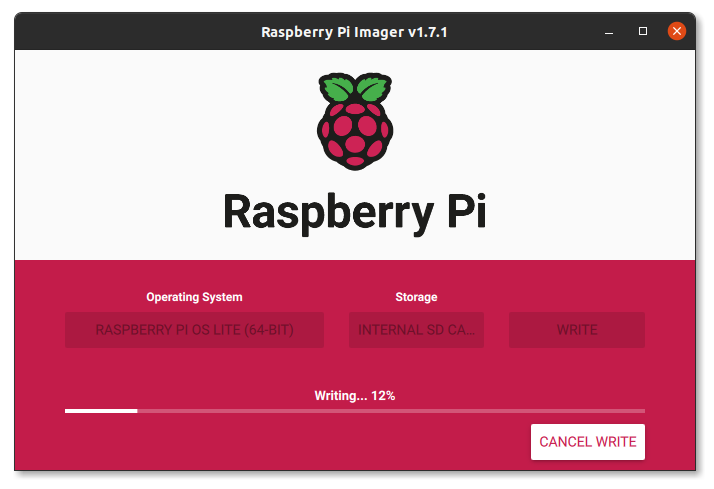
Click Write.
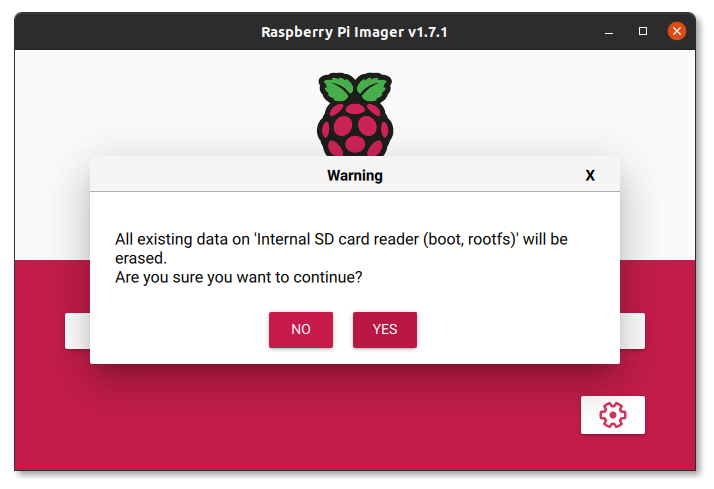
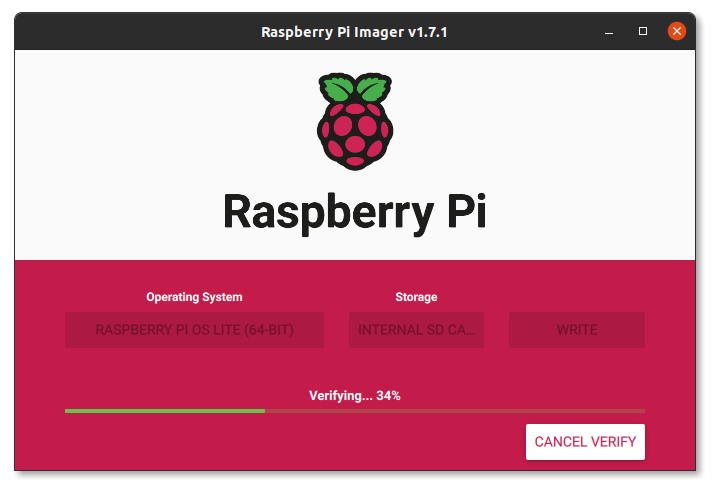
Click Yes, authenticate for root privileges then wait while the card is written and verified.
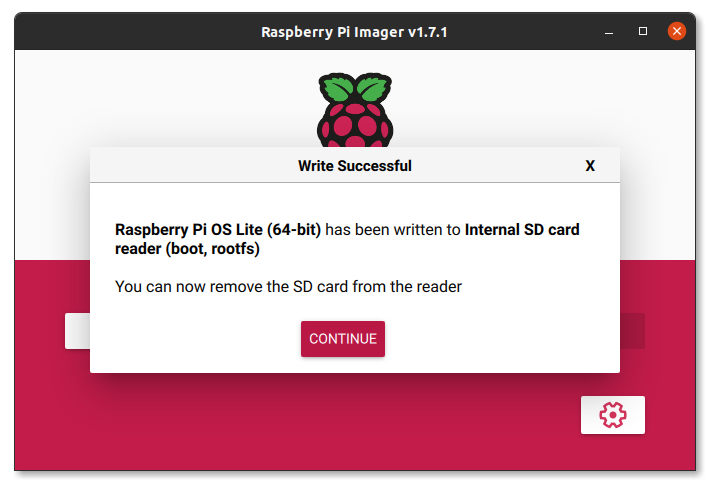
Click Continue and eject any volumes if they are still mounted. Remove the card and put it in the pi. Make sure you have an Ethernet cable attached if you didn’t setup WiFi earlier and power up.
Then SSH in to the pi using the hostname you set. If you didn’t change it then use the following command:
ssh pi@raspberrypi.local
For the example above it would be:
ssh pi@RasPi-4B-4GB.local
After you type yes (first connection only) you are straight in without even a password (this is very handy if you want to use scp to copy files over). You will see some text like the following (aarch64 indicates 64-bit):
The authenticity of host 'raspberrypi.local (192.168.0.10)' can't be established.
ECDSA key fingerprint is SHA256:{FINGERPRINT}.
Are you sure you want to continue connecting (yes/no/[fingerprint])? yes
Warning: Permanently added 'raspberrypi.local' (ECDSA) to the list of known hosts.
Linux raspberrypi 5.10.92-v8+ #1514 SMP PREEMPT Mon Jan 17 17:39:38 GMT 2022 aarch64

The programs included with the Debian GNU/Linux system are free software;
the exact distribution terms for each program are described in the
individual files in /usr/share/doc/*/copyright.

Debian GNU/Linux comes with ABSOLUTELY NO WARRANTY, to the extent
permitted by applicable law.

Wi-Fi is currently blocked by rfkill.
Use raspi-config to set the country before use.
Update the system:
sudo apt-get update -y && sudo apt-get upgrade -y
There shouldn’t be much yet as this is a fairly fresh image (just libcamera-apps-lite libcamera0 raspi-config rpi-eeprom currently).
Reboot if required for any updates:
sudo reboot
Tour
SSH straight in again if disconnected and have a look around. I’m only going to touch on some of the CLI updates and not cover anything graphical.
CPU
Some revisions of the Raspberry Pi 4 (with the SMPS) now run at 1.8 GHz by default. You can see if your device is set to this higher clock with the following commands:
lscpu | grep "CPU max MHz:"
If you see 1800.0000 then you have the new kit, otherwise you will see 1500.0000. You can check for 64-bit with the following commands:
lscpu | grep "Architecture:"
You should see aarch64 for 64-bit. If you see armv7l then this is 32-bit.
Python
Check the version of Python installed with this command:
python --version
You should see 3.9.2 and this is the only version installed. You can also use the python3 or python3.9 command. This is the same on the 32-bit version of Bullseye.
Having Python 3.9 installed by default and no end-of-life Python 2.7 is great. It’s a modern version supporting recent features, although 3.10 is out and it could be patched more (current latest versions are 3.9.10 and 3.10.2).
This is better than macOS was until very recently (shipping with Python 2 and hence no venv). However, Python 2.7 was removed from macOS Monterey 12.3 Beta.
Earlier pi releases used Python 3.7 but 3.9 is a good level. For example, you can use generic collection type hints such as list[str] rather than the old syntax of List[T] and the extra import needed in 3.8 and earlier (PEP 585).
The requests library is available out of the box so you can make HTTP requests. For example, launch a python shell:
python
Then run the following to get the current carbon intensity of British electricity generation (in gCO₂/kWh):
import requests
requests.get("https://api.carbonintensity.org.uk/intensity/").json()["data"][0]["intensity"]["actual"]
Quit with Ctrl-D.
If you want to install other packages then you will need to install pip first, as it is not included:
sudo apt-get --yes --no-install-recommends install python3-pip
The venv module is available by default, so there is no need to install it.
curl is also available by default, as an alternative to wget (although they have slightly different use-cases).
Pi-hole
You may want to install Pi-hole to block trackers and ads, thus improving your network performance. I’ve covered this before so you can just read the official guide or my previous instructions.
After installing you can change the password with pihole -a -p. You can also read my comprehensive update instructions for reference when a new version is released.
VPN
You might like to install a VPN for remote access (e.g. to Pi-hole or Home Assistant) and I would choose WireGuard, which is now available in the Linux kernel. OpenVPN is another option that I’ve used previously but today I would go with WireGuard for performance and security reasons.
You can use PiVPN to setup / manage a VPN. It’s a good idea to get it to enable unattended-upgrades to automatically patch with security updates (but not reboot).
Backup Image
If you’ve installed lots of software then you probably want to make a backup to save time in the future. It’s a good idea to clear things up first to reduce the size of the backup. The following commands remove caches, logs and temp files; clears the bash history and safely shuts down:
sudo rm -rvf /var/cache/apt/archives/* /var/log/* /var/tmp/* /tmp/*
history -c && history -w
sudo shutdown -h now
Swap the SD card back into your computer and find the device with lsblk. Then read an image with dd (be very careful with dd as you could wipe your main drive if you get it wrong).
For example, if lsblk showed the SD reader was /dev/mmcblk0 then make a copy of this to a file called backup.img in the current directory with the following command:
sudo dd if=/dev/mmcblk0 of=backup.img
This will take some time (8⁄9 mins for a 32 GB card even with decent hardware). This is because the whole SD card needs to be read, even the majority empty part. When done you will see something like this:
62333952+0 records in
62333952+0 records out
31914983424 bytes (32 GB, 30 GiB) copied, 514.716 s, 62.0 MB/s
You could compress this huge file with xz/gz and save a lot of space. However, it is better to resize the image first so that it is quicker to write back to a card. You can use the PiShrink script to do this:
sudo pishrink.sh backup.img
This is quick and you will soon see something like:
pishrink.sh: Shrunk backup.img from 30G to 2.7G ...
If you want to save even more space you can instead compress the image with the -aZ flags:
sudo pishrink.sh -aZ backup.img
This is much slower but not as slow as dd.
pishrink.sh: Shrunk backup.img.xz from 30G to 544M ...
In this example we shrunk 32 GB to 569 MB (544 MiB), a saving of over 98%.
N.B. Don’t use the -p sysprep option of PiShrink if using headless SSH. It will remove the keys and you won’t be able to get back in after restoring an image.
Restore with Imager
You can use Raspberry Pi Imager to restore your compressed image.
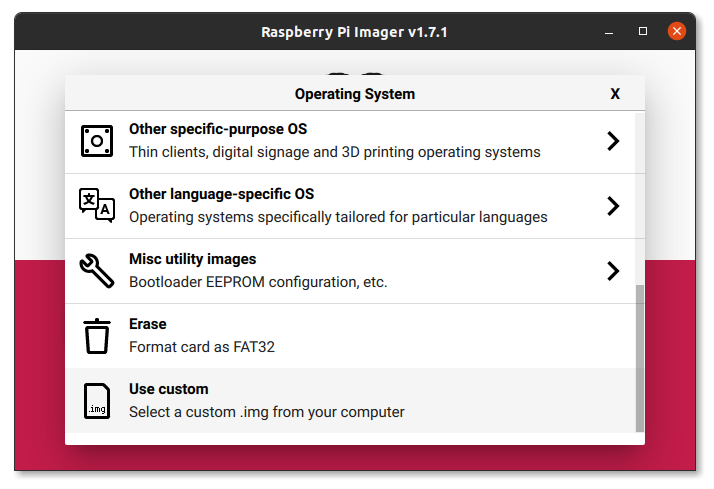
Scroll to the bottom of the OS list and select “Use custom”. You can then select the image file you created or one you downloaded, such as Home Assistant Operating System (which has recommended the 64-bit version for a while).
Simply choose the .img.xz file to write. There is no need to decompress it first as imager will do this for you.
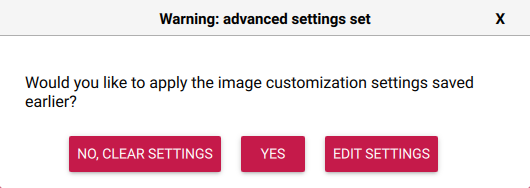
If you set advanced settings “to always use” before (not just for the session) then you may get warned if you want to apply them. You generally won’t want to do this with a custom image.
If all this sounds like hard work then I can provide a full service if you don’t want to DIY and supply a complete package of hardware assembly, software installation, configuration and setup. Get in touch if you’re interested.