There’s a new version of my Pi Glowbe (with more lumens) that you can read about here. This post was also featured in projects volume 2 (p108), without the environmental monitoring bit at the end.
I’ve written another article for the Mag Pi. You can read it below or get the PDF version. Turn to page 62 (page 64 of the PDF). If you like my writing then you may also enjoy reading my book on building high performance web applications.
Turn a globe into a glowing orb and use it to help you wake up in the dark winter months
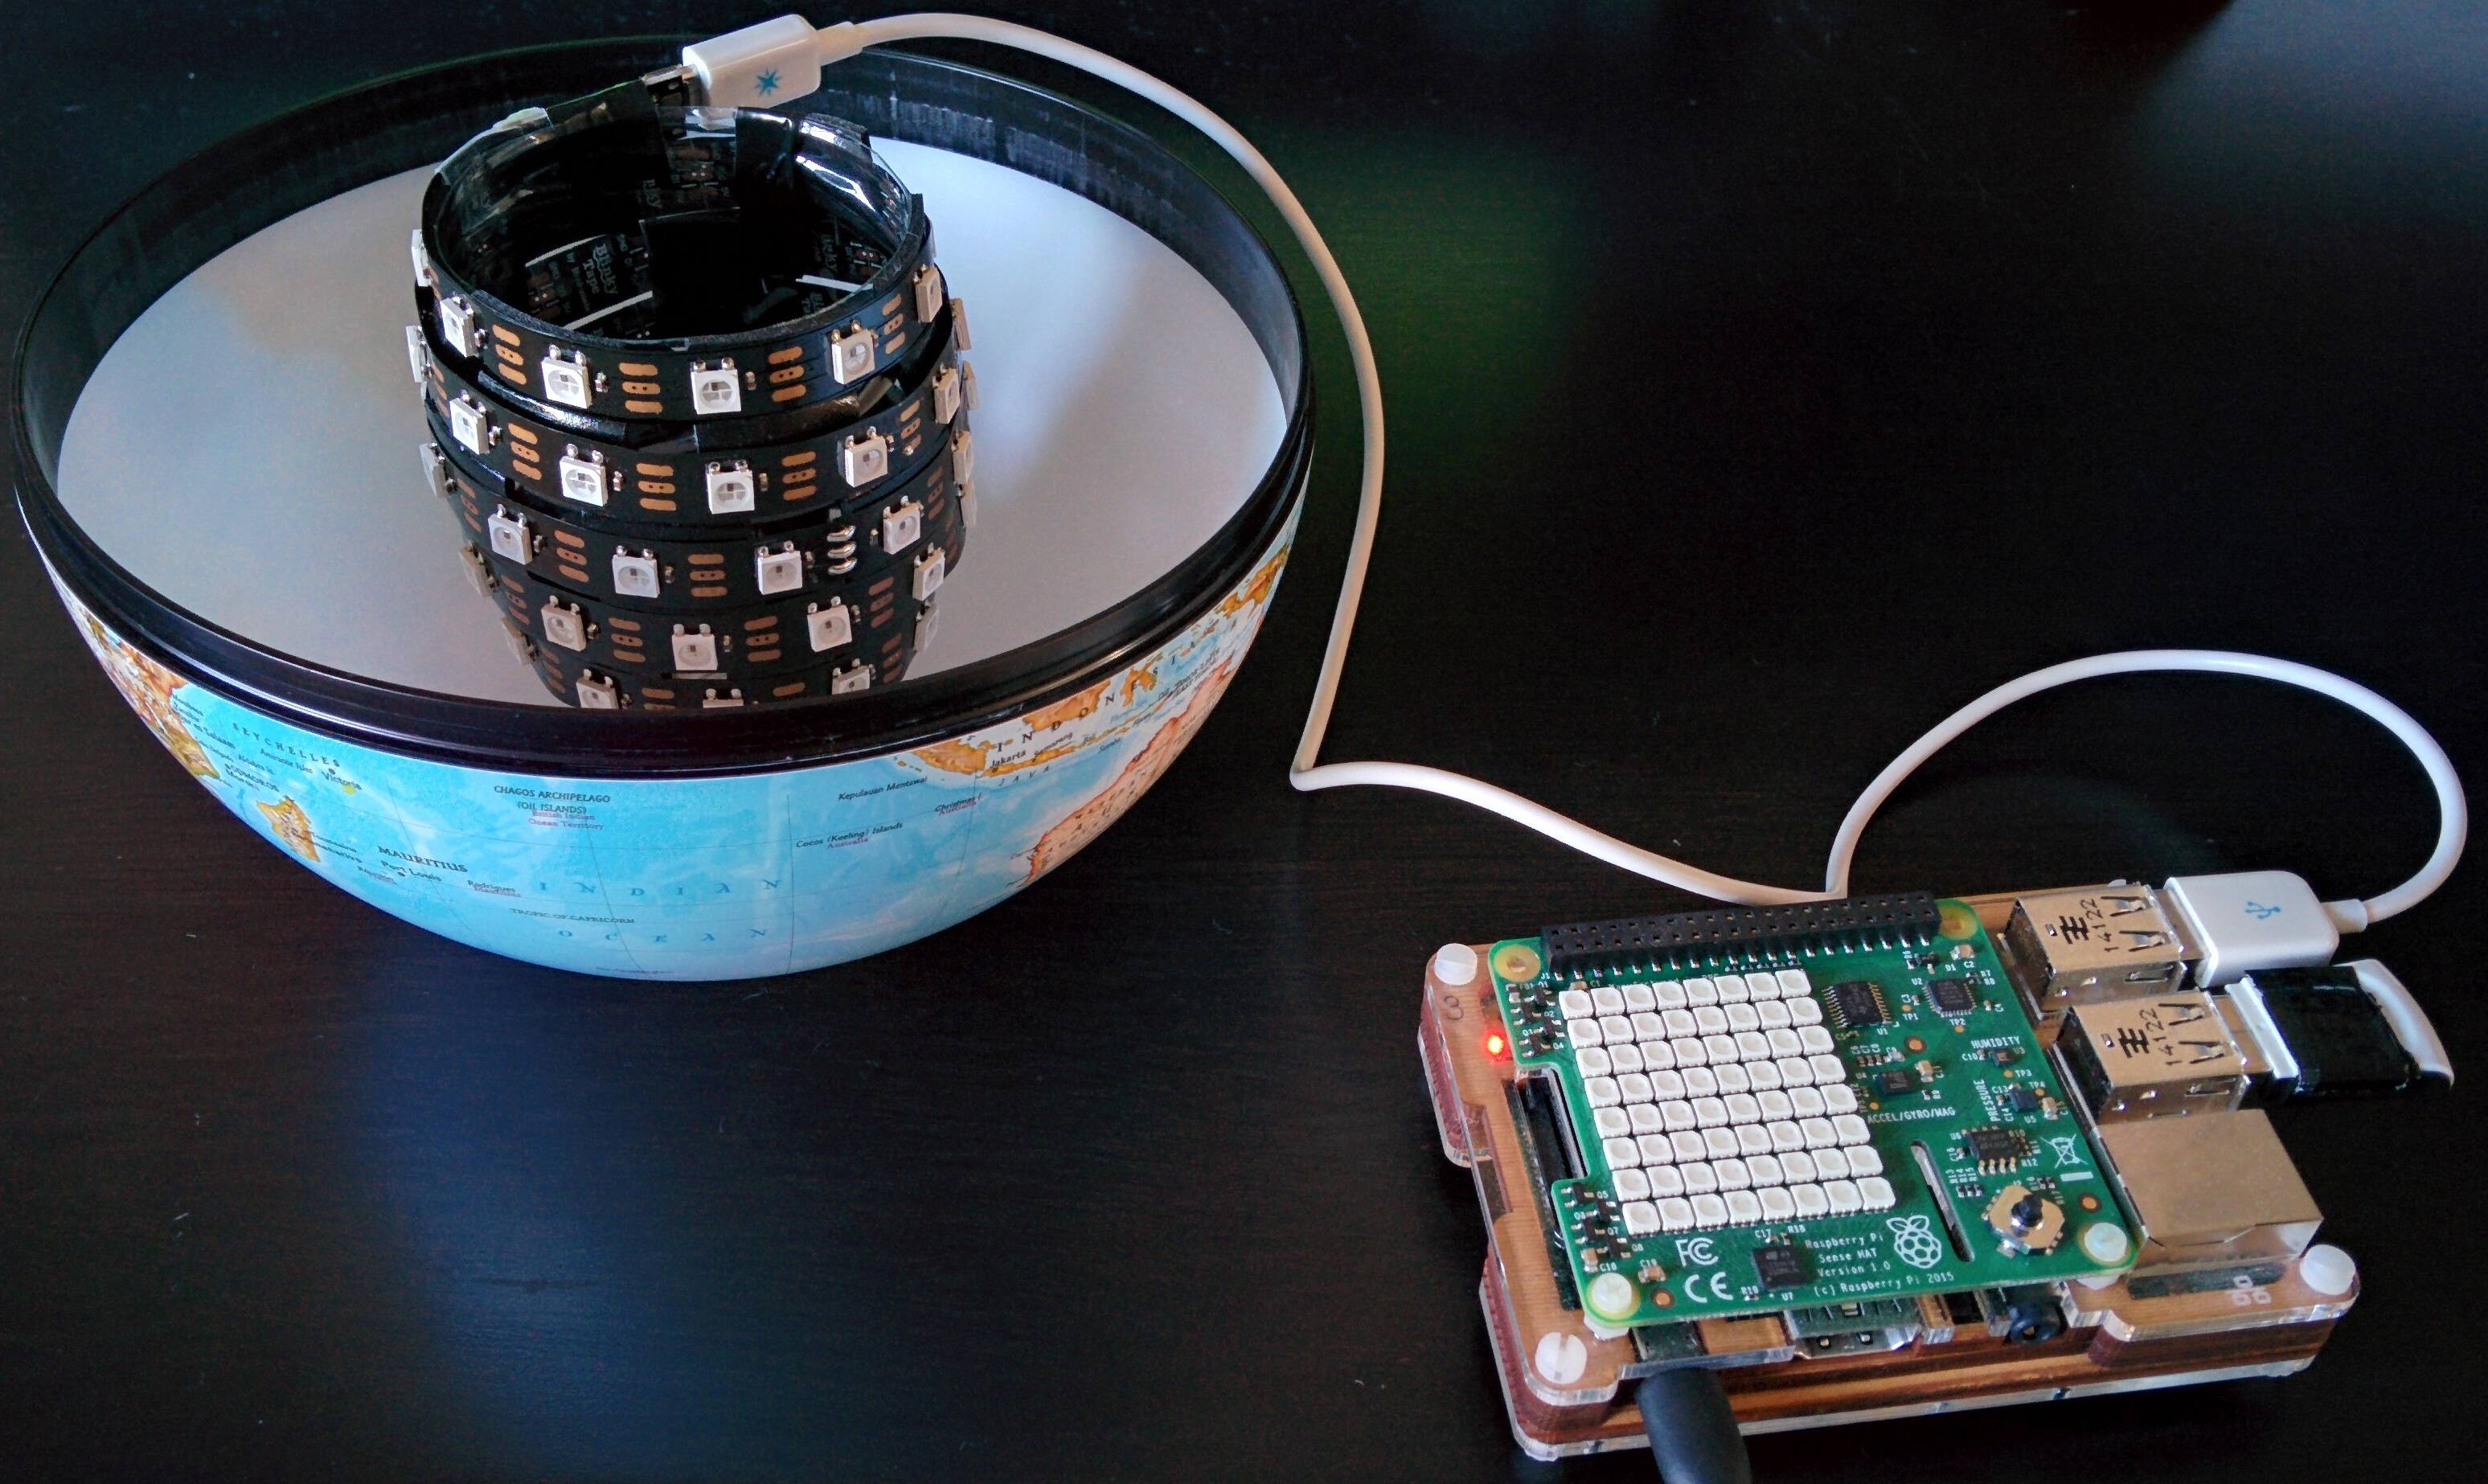
During the winter, or even at any time of the year, it can be difficult to get up in the mornings. If you wake before dawn, your body still thinks it’s night (because it is). You can buy wake-lights that trick your body into waking up by simulating a fake sunrise; they get gradually brighter as your alarm approaches. These can be quite expensive, so why not make your own with a Pi and some LEDs? To celebrate the Astro Pis on the ISS, we’ve built one using a Sense HAT inside a globe that was found in a charity shop – perhaps an unwanted Christmas present, now repurposed!
STEP-01
Make an LED bulb
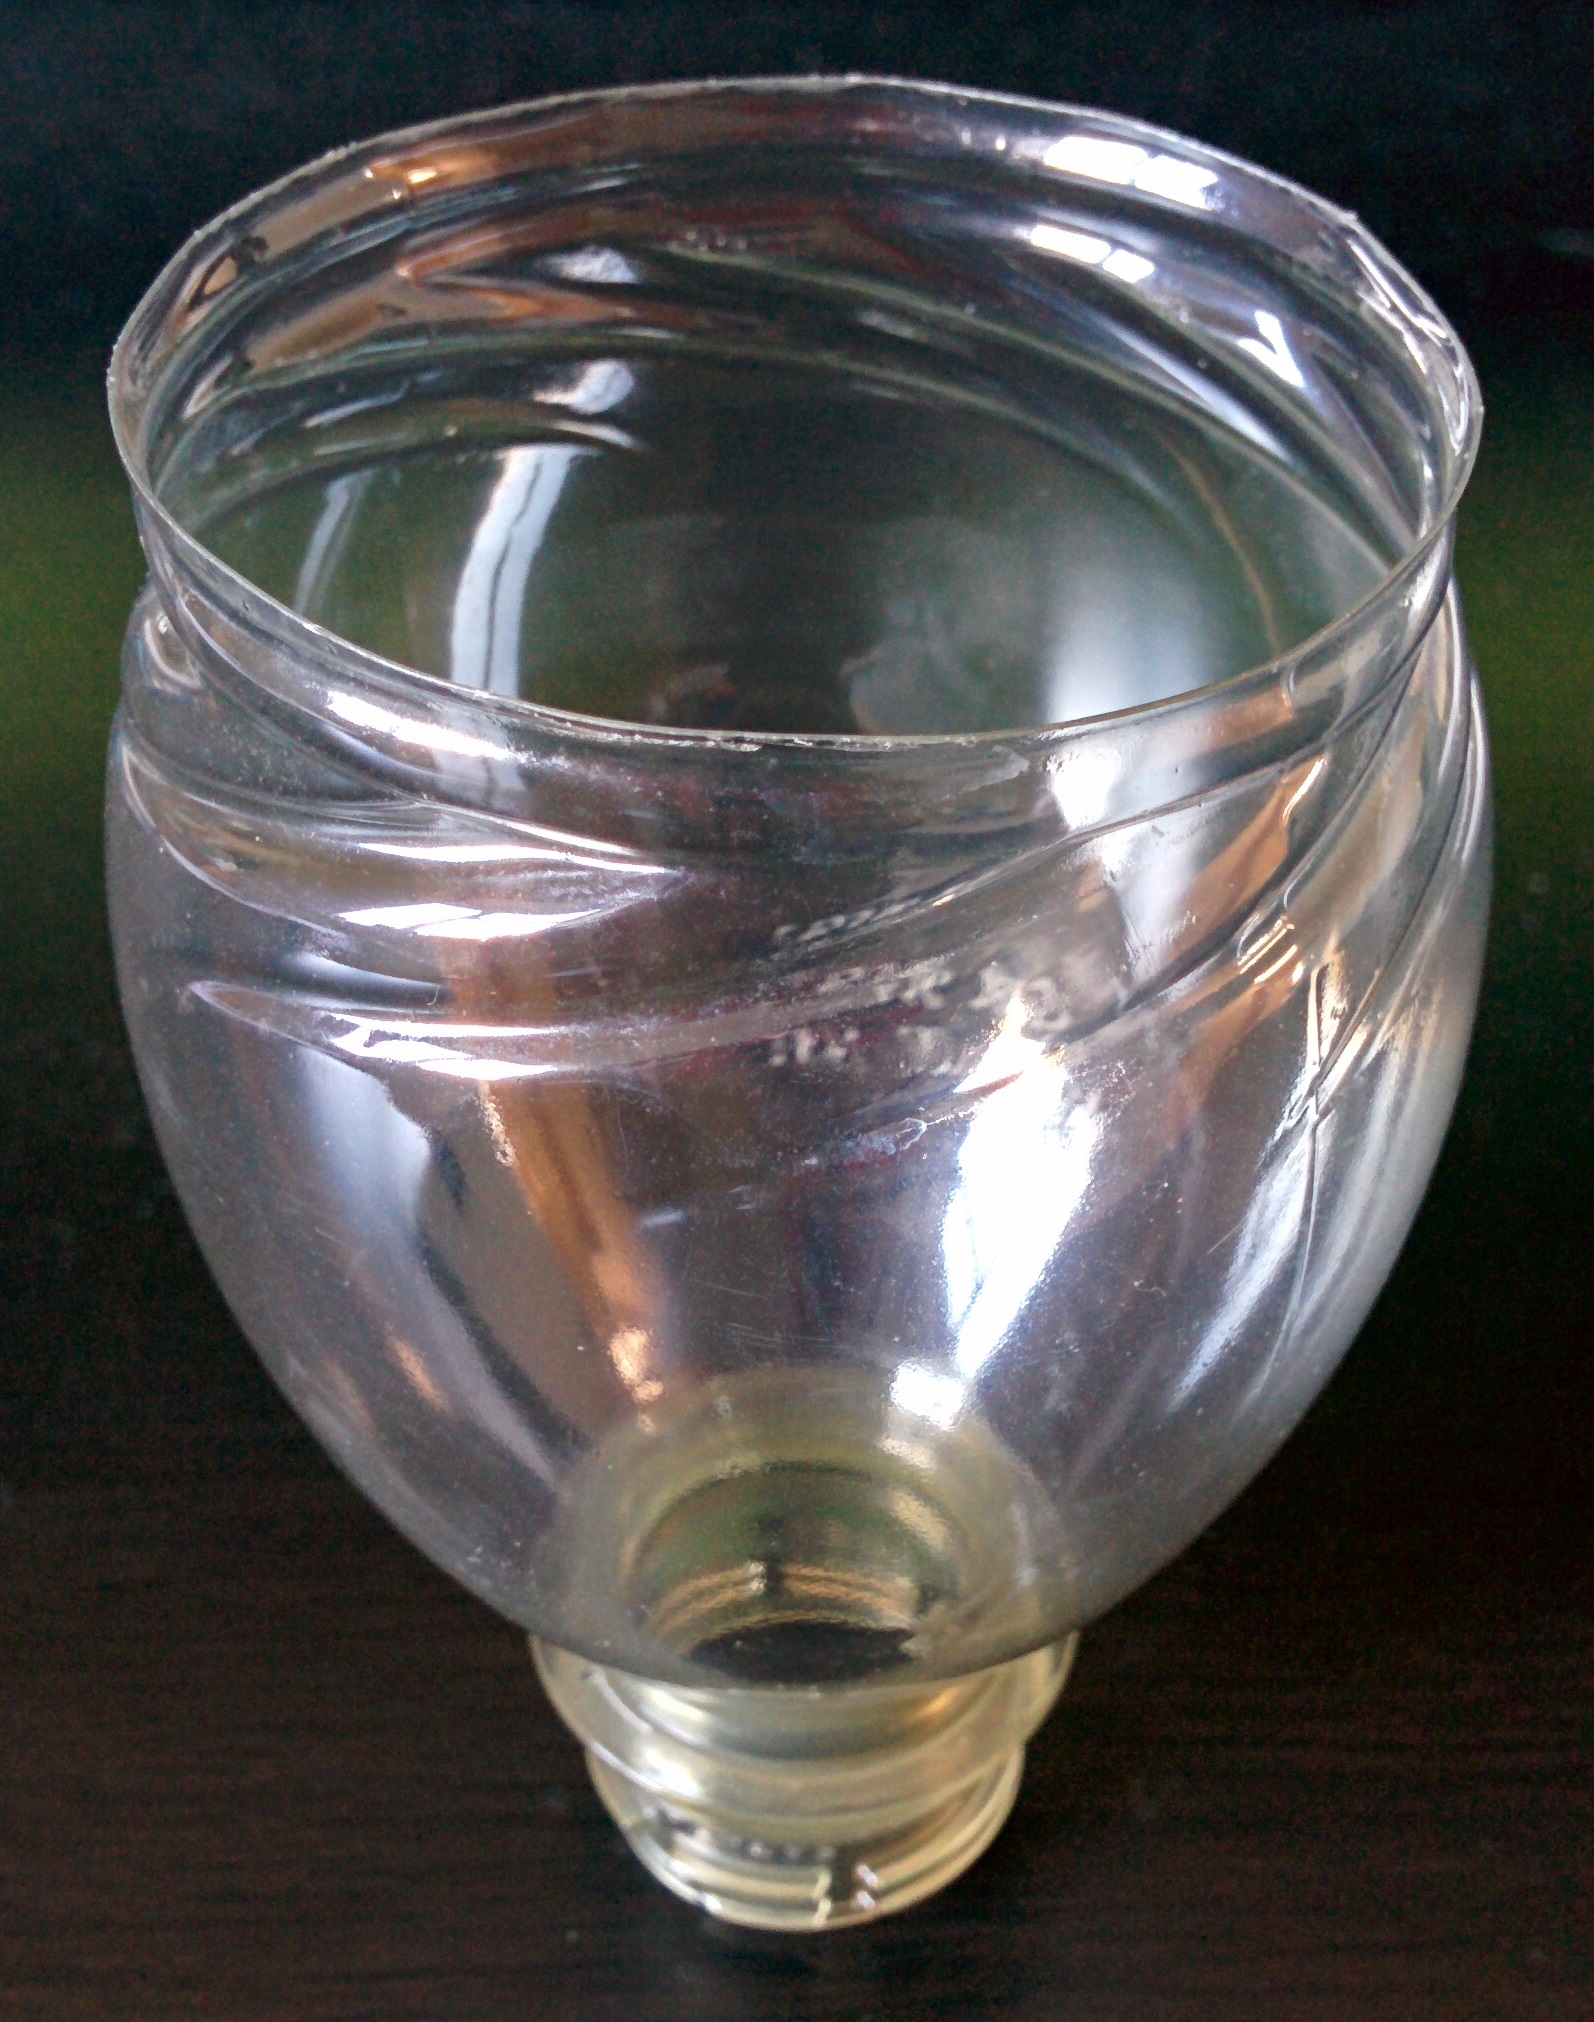
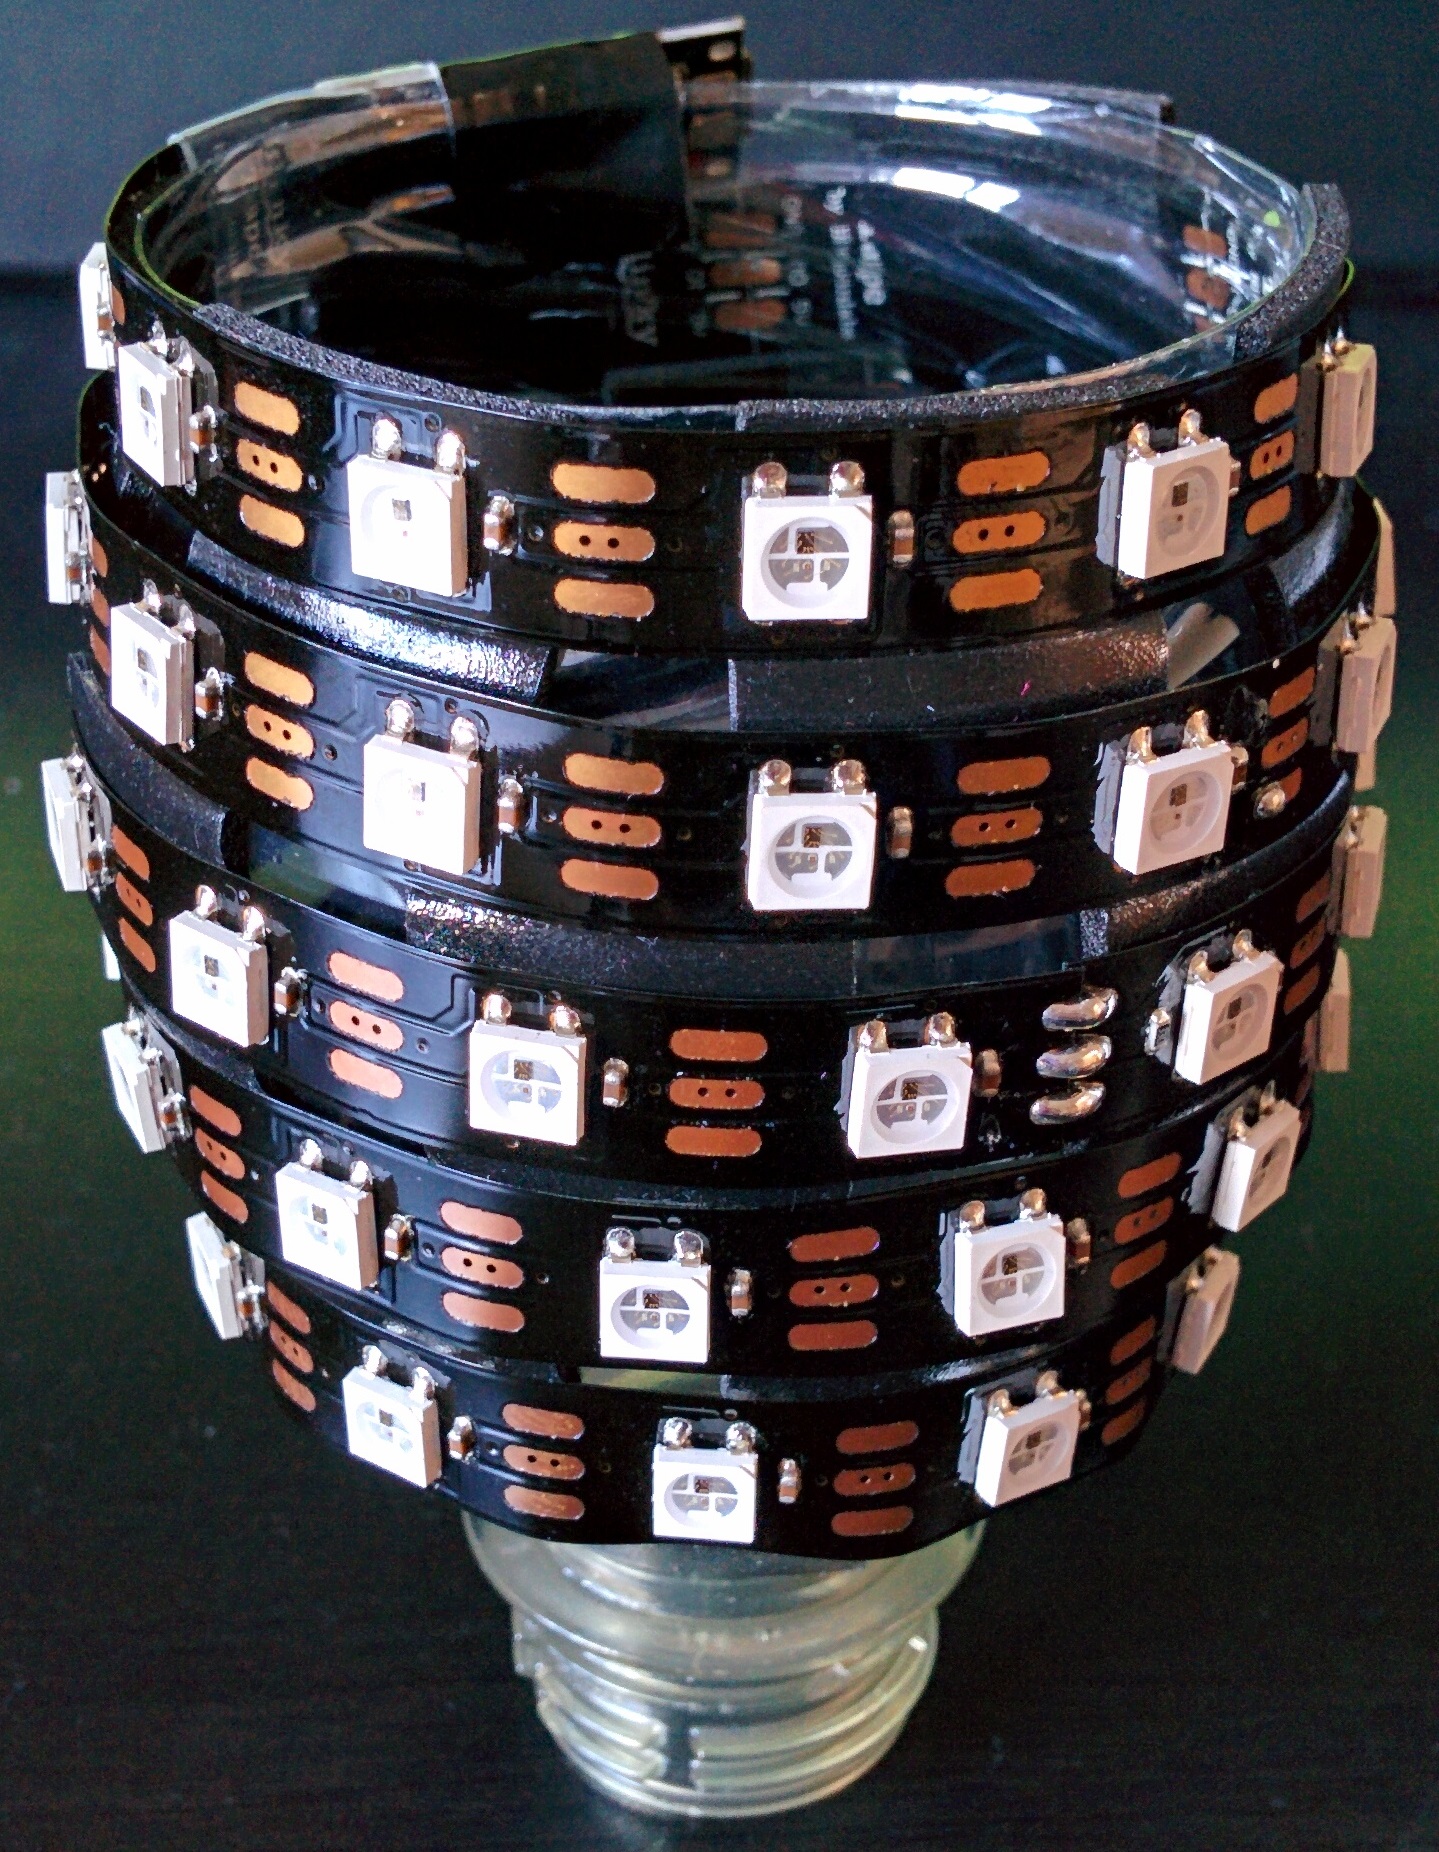
Create a bulb by wrapping an LED strip around a plastic bottle. You could skip this, but the Sense HAT is not bright enough to make a lamp. Cut the top off an empty plastic bottle, cover it in sticky pads and wrap the LED strip around it in a spiral. You can secure the ends further with tape. Have the connection end at the wider opening so that you can route the power cable to the Pi and then out through the centre. We’ll mount the Pi on top of the upside-down bottle end, so ensure it’s flat.

STEP-02
Destroy the world
Remove the Earth from its mount by pulling the pegs of the holder out of the holes in the Arctic and Antarctic. Next, split it in half along the equator by pulling the two hemispheres apart. It should disassemble fairly easily with a little force applied in the correct places. You’ll want to fashion a new mount to stop the globe rolling around, whilst still allowing the power cable to exit from the bottom hole – you could use the inside of a roll of tape. You can cut a small slot with a knife to allow the wire to enter.

STEP-03
Mount inside globe
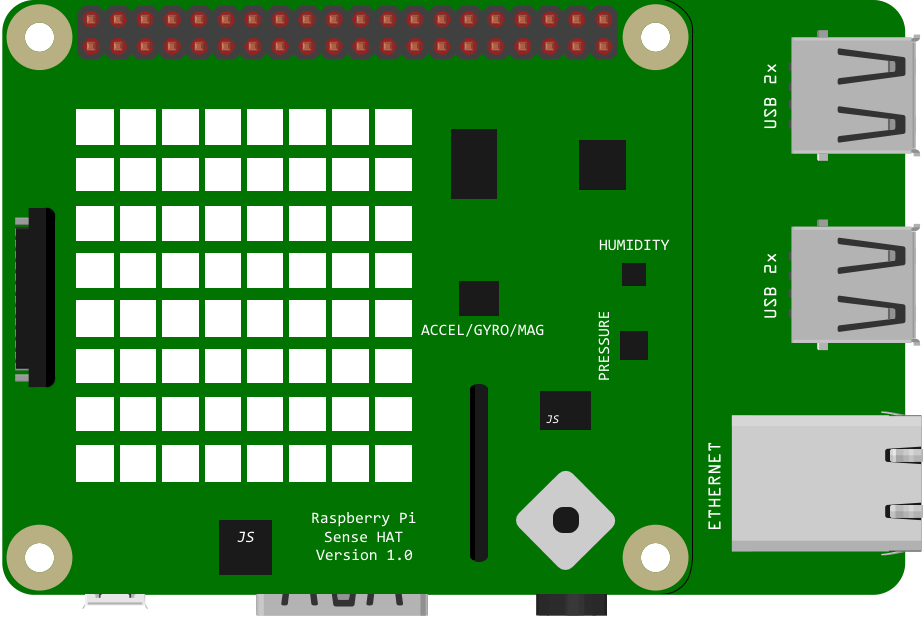
Attach your new LED bulb to the inside of the globe. Mount the neck of the bottle over the lower hole with Blu-Tack or putty; it should be sturdy enough to support the weight of the Pi resting on top of it. Mount the Sense HAT on the Pi, and then place both on top of the upturned bottle. Attach a USB WiFi dongle to the Pi (unless you’re using wired Ethernet or a Raspberry Pi 3), otherwise it will wake you at the wrong time. This is because the Pi requires internet access to set its clock.

STEP-04
Route the power
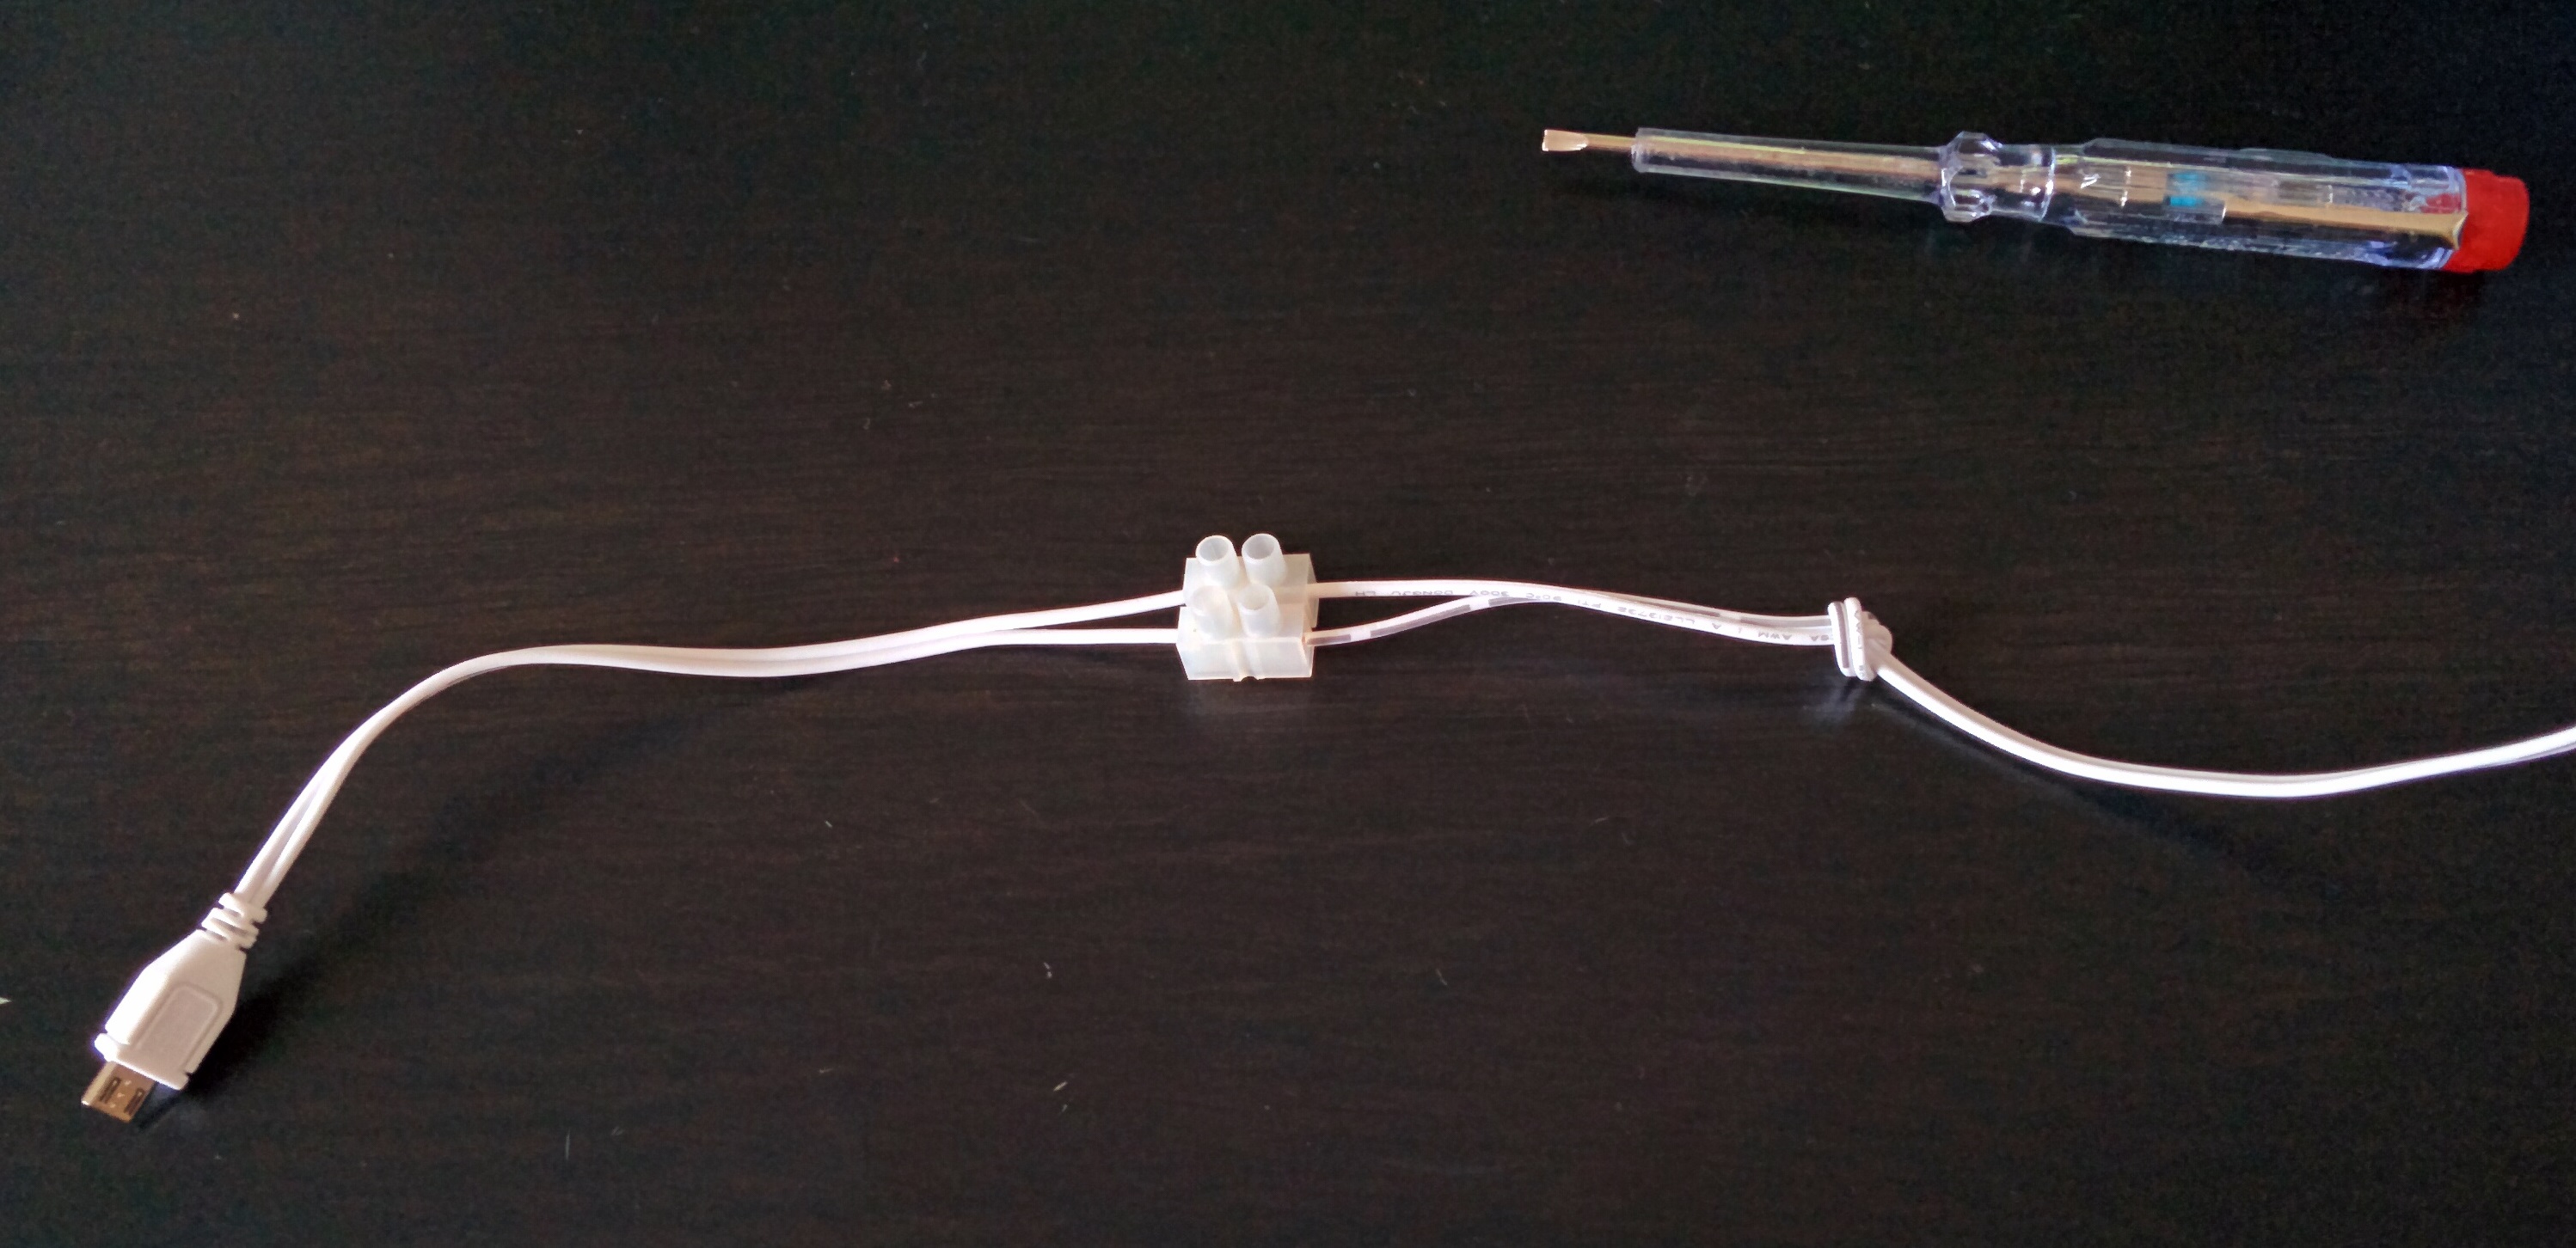
You’ll probably need to cut and reconnect the power cable to fit it through the hole. The official Pi power supply uses bell wire, which makes it easy to reconnect with a screw terminal (choc block). Unfortunately, it doesn’t supply enough power to use the LEDs at full brightness and also run the Pi. Cut the cable and insert the supply end through the hole. Tie a knot in the cable to stop it from being pulled back through. Separate the two power cores from both ends and strip the insulation. Reconnect with a choc block, matching the polarity.
STEP-05
Download the code
Clone the code from the GitHub repository into your home folder:
git clone https://github.com/jpsingleton/pi-glowbe
If you’re only using part of the hardware or a different LED strip, you can adapt the code to your needs. You may also need to install the Sense HAT software if you’re running an older version of Raspbian – follow the instructions at pythonhosted.org/sense-hat. You may also want to disable the LEDs on the Pi so they don’t disturb your sleep. Newer models can do this in software, otherwise you could tape over them, or even de-solder them if you’re brave enough.
STEP-06
Set up your schedule
We’ll run the code with cron. It should start about half an hour before you get up and probably only on weekdays. Launch the cron configuration by typing the following into a terminal:
crontab -e
Next, set it up by adding the following line to the end:
15 6 * * 1-5 python /home/pi/pi-glowbe/wakeup.py
This will run the code every weekday at 06:15, so change it to meet your needs. Save the file and exit the editor (ctrl+x, y, then enter in the default nano). Once happy, reassemble everything and wait for morning!

Next Steps
There are some downsides to this arrangement. I can’t run the LEDs at full power when using the Pi as it’s unable to supply enough current. I can when using the LEDs directly so I may use the controller on the LED strip to implement the gradual increase in brightness and use a simple socket timer to turn it on at the correct time.
The benefit of the Pi is I can use the internet to alter the alarm. It could indicate train delay issues or bad weather, either by using a different colour, throbbing or waking you up earlier. However, these could be achieved using an ESP8266 or similar. It could be useful for logging environmental information but unfortunately, due to a design flaw with the Sense HAT, the readings are not accurate.
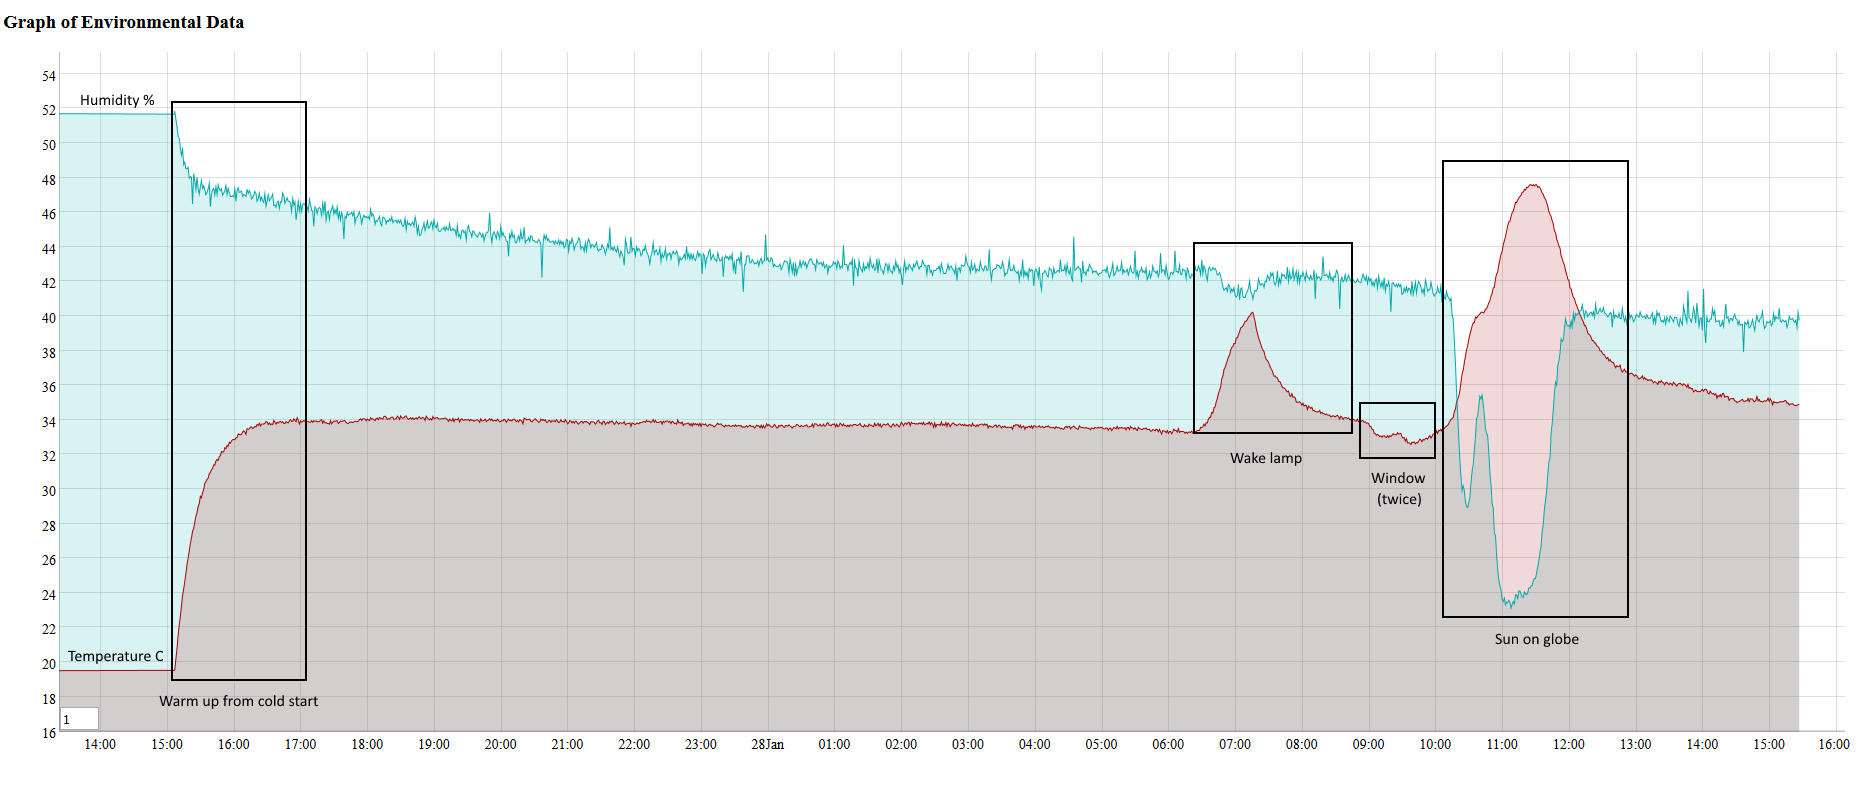
The Sense HAT temperature measurement chips read much higher than the ambient level. This is due to the PCB fill conducting heat from the Pi and also affects the humidity and pressure readings.
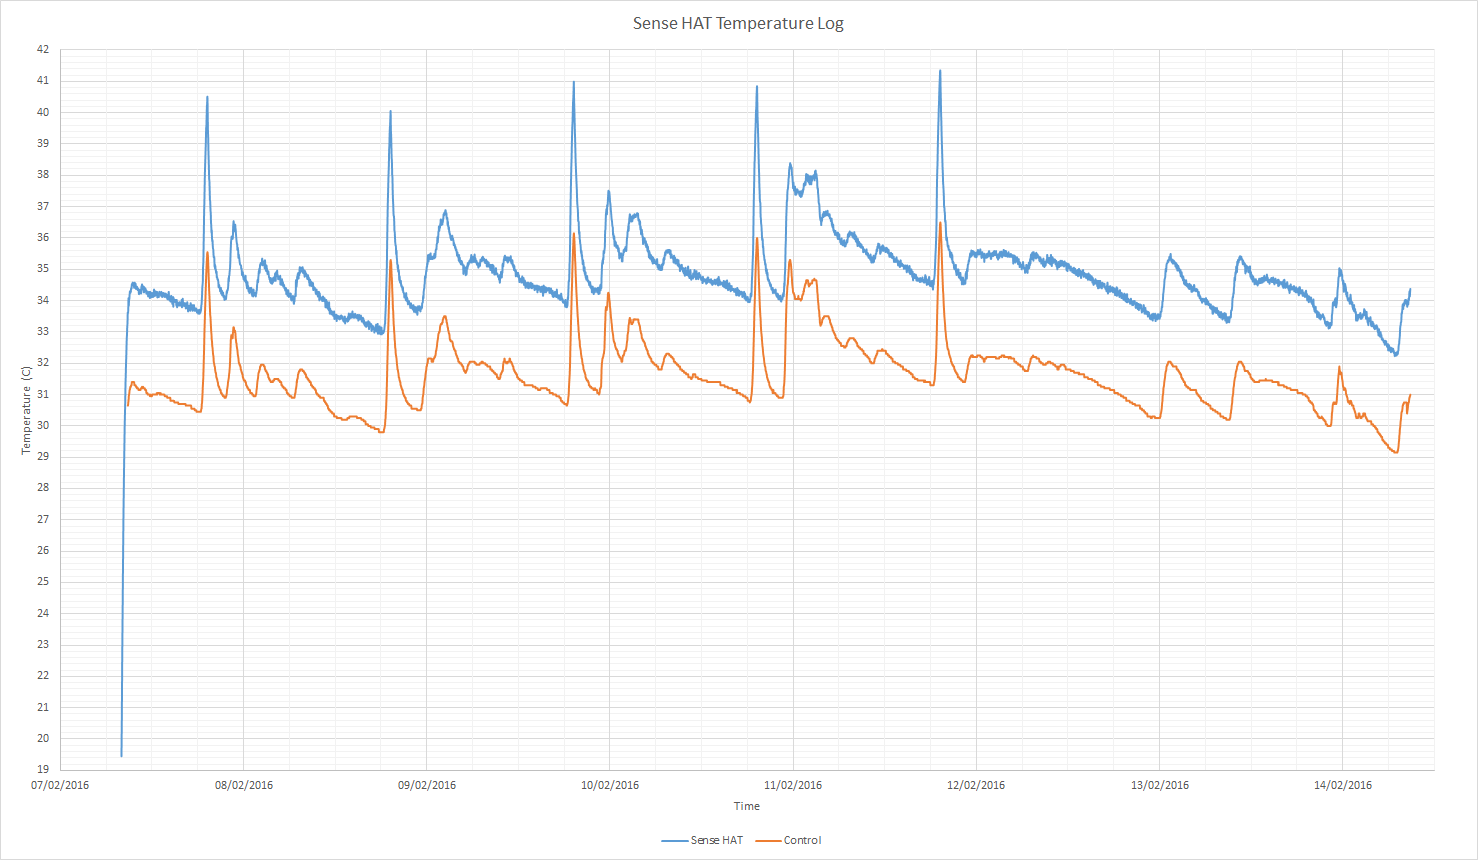
It’s possible to compensate for this a little in software, by taking the CPU temperature into account, but it’s not perfect.

Archived Comments
Mike Brewer says: 5th March 2016 at 8:34 am
This looks great. So how are you powering the neopixels or LED strip? Direct from the Pi from a USB socket?
James says:
5th March 2016 at 12:57 pmThanks. The LED strip is powered over USB from the Pi. Unfortunately the Pi can only supply limited current over USB whatever power supply is used. I tried with an ATX power supply that can deliver 15A at 5V. To run the LEDs at full power I’ll either need to remove the Pi and control them directly with the AVR or splice the power into the strip after the USB connection.